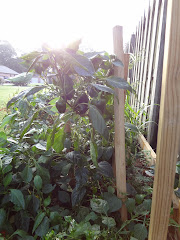
Nothing says fall like the yelling and screaming in an Italian household when it's time to can tomatoes. The bountiful tomato harvest is 'put up' in mason jars so spaghetti sauce can be made all winter long. This is a custom that began once our families settled in America. My grandparents' entire back yard was tilled up and used for planting-they must have tended at least 200 plants in their yard in Lorain. What follows are directions for the Cold Pack, or Raw Pack method. This means that the tomatoes are peeled and then placed into the jars whole, without being cooked first. (Dont you love this picture of my Grandma Delfina canning tomatoes in Montenero in 1980?)
One peck (10 lbs) of Roma tomatoes
Sterilized Mason or Ball jars, tops and lids (rings)
salt
Peel the tomatoes: Cut away any blemishes or spots. Submerge them in boiling water for a few moments. It's ok if the skin cracks. Then, scoop each tomato out into a bowl of ice water. After a moment in the cold bath, lay them out on paper towels. Make a small cut in the end opposite the core, and peel down to remove the skin. Core each tomato, and set it aside. Repeat in small batches for the entire peck.
Spoon the peeled tomatoes into the sterilized jars:you can cut them in half or quarter them if you'd like. Tamp the tomatoes down, so as to leave as little space as possible, but don't go overboard with it. Ladle in enough hot water to fill jar, leaving about 1/2" 'headspace', meaning distance from the filling to the top of the jar. Run a small spatula round the inside of the jar to minimize airspace. Add one teaspoon of salt to the tomatoes in the jar. Wipe the top of the jar and the outside threads clean with an immaculately clean, hot cloth. As directed by the instructions that come with the jars, remove the tops and lids one at a time, right from the hot (NOT boiling) water as needed. Place lid on jar centering sealing compound on rim. Screw band (ring) down evenly and firmly, just until resistance is met-fingertip tight.
Process jars: Submerge jars into simmering water in a canner (big pot) with an elevated rack specifically for this purpose. Make sure jars are covered with water by about one and a half inches. Bring water in canner to a boil. At this point, place the lid on the canner and set your timer for 40 minutes. When time is up, carefully remove jars from the canner with the special lifter. Stand jars on a clean kitchen towel so they may cool. After 24 hours, check lids for seals. Lid should not flex up and down when center is pressed.
Sunday, September 23, 2012
Sunday, September 16, 2012
Homemade Applesauce
Here is the first in our series of traditional Fall Favorites.
This is the easiest dish. Ever. I learned to make it one September Saturday morning exactly twenty years ago from a sailing buddy named Nancy. She surprised me by coming over with a big bag of apples and all of the supplies. We made the applesauce on an old oven, in a tiny kitchen with a view of an alleyway. That day, I learned what a Foley food mill was, and what a pleasure it can be when a friend teaches you something new. Today's batch included a trip to the farmers' market, complete with delicious lunch out. We made the applesauce on a Jenn Air cooktop, in a gourmet's dream kitchen with a mountain view. Tammy showed me how to make the applesauce in a completely different way. Tammy, it was such a pleasure to share this experience with you and Isabel.
Ingredients
Apples
Sugar
fresh lemon juice (to prevent browning of fruit)
Pinch of salt
Cinnamon sticks (optional)
We got a peck of apples, which is a little over 10 pounds. The varieties of apples we found that day were: gala, macintosh, fuji and WV granny smiths (or mutsu apples) You'll get the best results with tart apples with firm flesh. Look for the signs that say 'great for baking'. Mixing varieties adds flavor.
Method
Wash apples thoroughly. Prepare a large stockpot with one inch of water and 1/4 teaspoon of salt on the bottom. Add one tablespoon of fresh squeezed lemon juice for every 5 pounds of apples. You can add two three inch cinnamon sticks to the stockpot for every 5 lbs of apples, if you like cinnamon.
Cut apples into one-inch chunks. (No need to remove skin or seeds or stems) Add apples to stockpot with 1/4 cup of sugar (or less) for every 5 lbs. Cook on medium to medium low heat until apples are quite soft. Using a spaghetti scoop, transfer the cooked apples to the Foley food mill. Crank over a bowl to catch the applesauce.
Crank constantly, approximately five times clockwise, then once counterclockwise to clear the skins. Repeat until all that's left in the mill are the skins. Refill and repeat.
Sunday, September 9, 2012
Giardiniera-Italian Relish fresh from the Garden
The City of Chicago is home to this snappy Italian Relish made by 'pickling' garden vegetables. You can enjoy it as a condiment on sandwiches, or as a sidedish, cold and tart from the fridge. Grandpa Marshall was so proud that he was born in Chicago, maybe that's why he ate giardiniera every day. (This version contains way less salt than the traditional version.)
Ingredients
1 head of cauliflower
1 pound of carrots, preferably organic
4-5 stalks of celery
1 green or red pepper
2 Hungarian (or banana) peppers
6 sprigs of fresh oregano
6 sprigs of fresh parsley
whole black peppercorns
dried dill and/or basil
if you want a hot and zesty version:
peeled garlic cloves
serrano peppers or crushed red pepper
green olives
For the vinaigrette to fill the bottles:
1 1/4 cup champagne vinegar
4 cups Canola Oil
1 Tablespoon sugar
salt and pepper to taste
Method
Dice all of the veggies to a uniform size, except the cauliflower. Prepare the cauliflower by removing the thick stems and leaving 2 inch 'trees'.
Bring a pot of salted water to a heavy boil. Submerge the cauliflower trees for several minutes, but not so long that they lose their crunchy texture. Remove and drain. Separate the cauliflower into small florets. While they're still warm, sprinkle with one tablespoon extra virgin olive oil, 1/2 teaspoon salt and 1/2 teaspoon of pepper. Repeat this process with the carrots. Now mix the cauliflower, carrots, celery, green (or red) peppers and hungarian peppers altogether in a big bowl. Sprinkle the mixed veggies with dill and/or basil.
Prepare the jars:
Distribute the herbs, peppercorns, and for a spicy batch, garlic, green olives and serranos into 6 half pint, immaculately clean mason jars. Make the vinaigrette.
Spoon veggies into the jars. leaving 1/2 inch headspace (room at the top) Fill jars with the vinaigrette, place seals, and screw caps on tightly.
Refrigerate for two weeks and then enjoy.
Sunday, September 2, 2012
Marcy's Linguini Salad
Aunt Marcy has made this linguini salad for all of the kid's birthdays. The accompanying photo shows Aunt Ida, Aunt Marcy, and Uncle Rick enjoying the linguini salad at my dad's 65th birthday, in 1995! On this special June 4, my dad received $65 in pennies from, Marcy, his sister-in-law, and her family as a gift. :) What a glorious day.
Ingredients
2 lbs of linguini
1 small bottle of Salad Supreme Seasoning (in the spice aisle)
1 green pepper, diced
1 onion, chopped (I used red because Lee likes them)
1 small jar of pimento
2 (16 oz) bottles of Robusto or Zesty Italian salad dressing
Method
Cook linguini until tender. Drain well.
While pasta is still hot, toss with the salad dressing. Add green pepper, onion, pimento. Stir altogether, and refrigerate until cold. Can also be served warm, or at room temperature. This recipe makes enough for 24 as a sidedish; it's easy to cut the recipe in half.
Tuesday, August 28, 2012
Italian Potato Salada
Years ago, I was literally the last one to the party-a graduation at the Orlando's house. Donna, ever the gracious hostess, led me to the buffet table. Even hours after the time on the invitation, everything still looked plentiful and delicious. When I asked about her potato salad, Donna explained that Vince, her husband, was 'not too crazy' about mayonnaise. She created this Italian version for him.
Ingredients
6 potatoes (I used Yukon Gold and did not peel them)
3 hard boiled eggs, chopped
2 green onions, chopped
chopped parsley
oil and wine vinegar*
salt and pepper to taste
*(I used 1/2 cup extra virgin olive oil and 3 Tablespoons champagne vinegar)
Method
Boil potatoes until done.
Peel and dice potatoes.
Add all ingredients and mix well.
Sunday, August 19, 2012
Aunt Bonnie's Chickpea Salad
Buon Giorno, Dear Readers
Grazie for clicking back in! Hope your summer has been refreshing for you.
A life long family friend unwittingly gave me this recipe via my mother. It is a wonderful summer salad featuring garbanzo beans and garden fresh ingredients just right for this time of year. Featured years ago in the Cleveland Plain Dealer, this recipe is from the cookbook 'La Dolce Vegan' by Sarah Kramer.
Ingredients
2 16 oz can of garbanzo beans, rinsed and drained
1/2 small red onion, minced
1-2 garlic cloves, minced
1 large or two small tomatoes, diced
1/4 cup chopped fresh parsley
1/4 cup plus 1 Tablespoon extra virgin olive oil
2 Tablespoons red wine vinegar
1 Tablespoon freshly squeezed lemon juice
1/2 teaspoon salt
1/2 teaspoon freshly ground black pepper
Method
In a large mixing bowl, combine all ingredients. Allow flavors to blend for at least one hour before serving. Overnight tastes even better.
**PS Garbanzo Beans and Chickpeas are the same-a-la-thing
Sunday, May 20, 2012
Update and some FAQ's
Buona Sera, Dear Readers,
Just wanted to fill you in on some upcoming news about the 'Montenero Cookbook Project' blog.
Q. Julie, what about the cookbook? Are we ever going to see that, or will this just be a blog?
A. My whole purpose of creating the blog was to write the cookbook one recipe/topic at a time . It's working! I've had wonderful responses and beautiful correspondence with Montenerese near and far. (Well, mostly far) We test each recipe as we go along, so that when the book is published and people try to make the recipes, we can be sure that they work. Also, many people love to look at the pictures. :)
Q. We understand that this is not your day job, but the format is getting a little bit ho-hum. Will you ever do anything differently, or at least change the colors and fonts?
A. Early on, Lisa Freda Amundsen suggested a website instead of a blog-BRILLIANT idea. We'll be switching to this over the summer. If anyone would like to kibbitz (a Yiddish term for chime in) please just let me know! We'll have lots of fun putting together something for the next generation.
Q. I found a great picture/recipe/idea...will you ever write it up?
A. You bet!!! I love learning about our history and what's important to everybody. That's what this is all about.
Q. Julie, how will you learn how to make the blog better?
A. I will be attending the 'Blogher Food Conference' in Seattle, WA on June 8-9th. The workshop I'm most looking forward to is 'Differences between Cookbook and Blog Photography'. Most other seminars are about sustainable topics and literally solving world hunger. There is a field trip scheduled to Seattle's famous Pike Place Market-another highlight for sure.
Mangia Bene,
Julie
Subscribe to:
Comments (Atom)


